Custom Phone Cases: Adding a Configurator to Shopify
Add a custom phone case configurator to Shopify. Live preview, multi-model support, and image-upload personalization for case brands.
Custom Phone Cases: Adding a Configurator to Shopify
The global phone case market is measured in the tens of billions of dollars, but estimates vary by source and methodology. Most reports put annual growth in the low- to high-single digits, while personalized cases remain one of the more attractive subsegments for Shopify merchants. Two out of three smartphone owners buy phone cases—and many of them aren't satisfied with generic designs. They want personalization.
For print-on-demand (POD) merchants, this is a strong category to test configurators. Custom phone cases have low setup cost, zero inventory risk, and room for healthy margins if you get pricing right.
But here's the catch: adding a configurator isn't just about picking an app. You need the right file specs, printing method, model coverage, and live preview setup. Get one wrong and your conversion rate tanks.
This guide covers everything you need to launch custom phone cases on Shopify—from configurator selection to the pricing math that actually works.
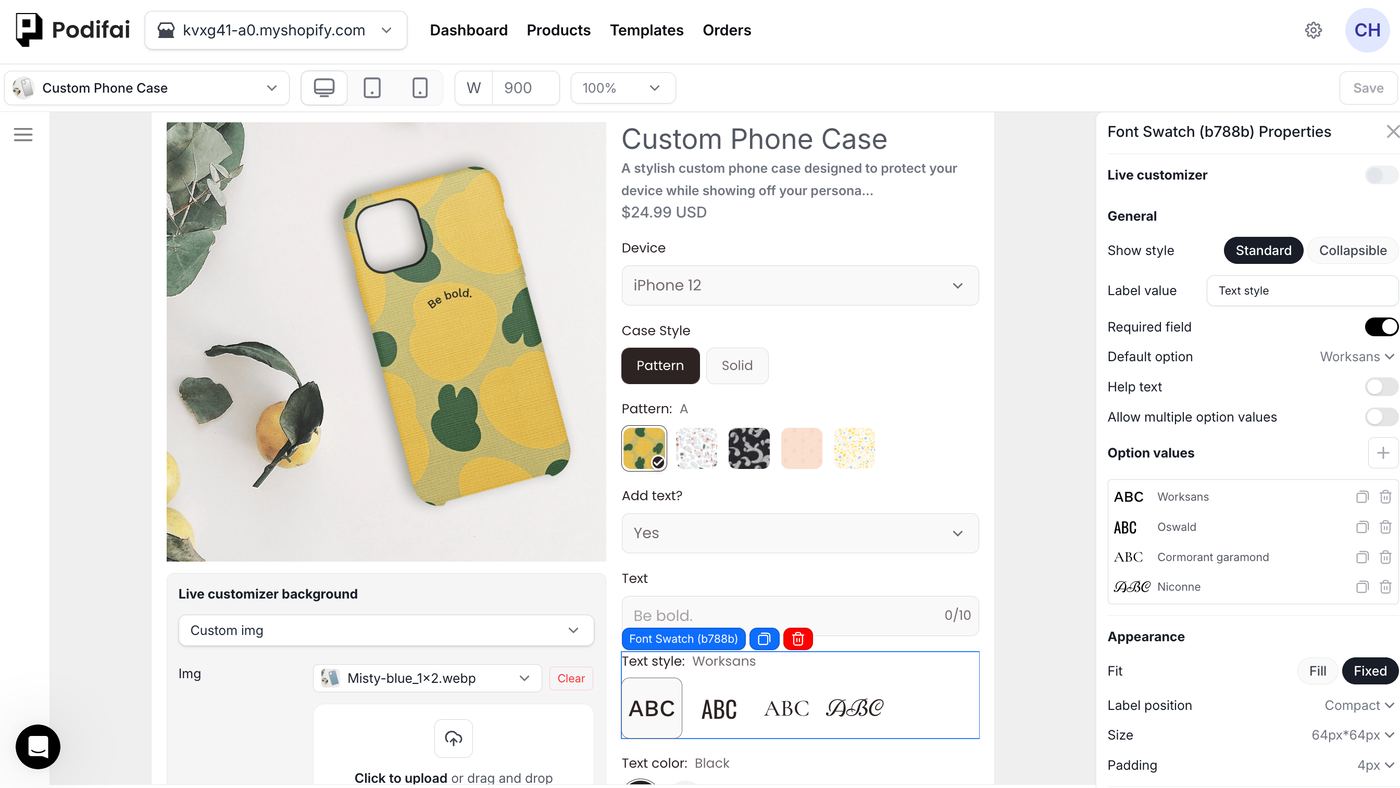
Why Phone Cases Are the Perfect POD Product
Before we talk setup, let's be clear on why this works so well as a POD product.
Low barrier to entry. You don't need a supplier relationship. Printify, Spring (formerly Teespring), and dozens of POD platforms print phone cases directly to customer orders. No minimum order quantities. No inventory sitting in your garage.
High customer demand. Phone cases are consumable—they wear out, crack, get outdated, or stop matching the customer's current phone model. Replacement timing varies widely by customer and case quality, which creates repeat potential.
Margins support customization. Supplier cost varies by case type, phone model, shipping zone, and POD partner, but retail price typically ranges $18-35 depending on case type. That leaves room for a configurator fee ($3-5 markup) if your supplier cost and shipping math support it. Compare that to apparel, where margins are often tighter and customization fees squeeze profit.
Evergreen SEO potential. "Custom phone case," "personalized phone case," and model-specific searches (like "custom iPhone 16 case") have consistent search volume year-round. Unlike seasonal products, this traffic doesn't drop off.
Visual products drive configurators. Phone cases live or die on how they look. A static product image doesn't cut it. Customers need to see their design on their exact phone model before checkout. This is where live preview becomes critical.
Phone Model Coverage Strategy
The biggest mistake: trying to support every phone model at launch.
You can't. Not yet. Instead, use this tiered approach:
Tier 1: iPhone (Core models)
- iPhone 16, 16 Plus, 16 Pro, 16 Pro Max
- iPhone 15, 15 Plus, 15 Pro, 15 Pro Max
- iPhone 14 (still in heavy use despite newer models)
iPhone covers roughly 55% of the US smartphone market and about 18-24% globally depending on the reporting period. Start here. (Source: StatCounter / IDC, 2026)
Tier 2: Samsung Galaxy (High volume)
- Galaxy S24, S24+, S24 Ultra
- Galaxy A Series (A54, A34—budget segment with high volume)
- Galaxy Z Fold / Flip (premium, higher AOV)
Samsung is about 18-20% of the global smartphone market in recent annual reports. Galaxy cases have strong search volume. (Source: IDC, 2026)
Tier 3: Expansion (Add in month 2-3)
- Google Pixel (6, 7, 8 series)
- OnePlus (for enthusiast segment)
- Motorola Edge series
Don't launch with Tier 3. You'll dilute your inventory, complicate your configurator setup, and reduce your ability to create quality mockups.
Case Types to Prioritize
Within each phone model, offer these case types in order of profitability:
- Snap Cases ($16-24 retail) — Lightweight, low production cost, fastest print time, high margins. Start here.
- Tough Cases ($24-32 retail) — Multi-material, higher perceived value, +$8-10 production cost, higher AOV.
- Wallet Cases ($28-35 retail) — Premium segment, +20% margin premium, smaller market but high intent buyers.
- MagSafe Cases ($26-40 retail) — Requires specific design specs, compatible with magnetic mounts. Test demand before going all-in.
Why This Matters for File Specs
Each case type needs different print areas and safe zones. A snap case has flat edges—full bleed is possible. A tough case has curved edges—you need 0.25" safe zone margins. Wallet cases have a fold line you can't print across.
If your configurator doesn't enforce these rules, you'll get chargebacks from customers whose designs wrap where they shouldn't.
Print Methods and File Specifications
Your print method determines everything: file format, DPI, color profile, and what designs actually look good.
UV Printing
Best for: Full-color photo designs, detailed artwork, photo collages
How it works: UV inks cure instantly under LED lights. Vibrant colors, no drying time, industrial process.
File specs:
- Format: PDF or high-res TIFF (300 DPI minimum)
- Color profile: use the profile specified for this supplier and printing process; RGB versus CMYK is not a universal rule.
- Safe area: 0.25" margin on all edges for snap cases; 0.375" for tough cases
- Maximum file size: 50 MB
- Bleed: 0.125" beyond final trim size
Pros: Photo-realistic output, fast turnaround (24-48 hours), vibrant colors Cons: Setup cost ($3-5K+ for in-house), requires higher DPI precision, not ideal for very fine text under 6pt
Best POD suppliers for UV printing: Printify, Spring (formerly Teespring), Contrado
Sublimation Printing
Best for: All-over patterns, gradient designs, dye-based colors
How it works: Designs are printed onto transfer paper, then heat-pressed onto the case. Colors bond permanently.
File specs:
- Format and resolution: use the supplier’s accepted format and required pixel dimensions at the final print size.
- Transparency: Fully supported (sublimation inks bond to polyester-coated surfaces)
- Safe area: 0.25" margin standard
- Color profile: follow the exact supplier specification and approve a physical sample.
- No black underbase needed
Pros: Durable, vibrant colors, supports gradients beautifully, works on curved surfaces Cons: Slower turnaround (3-5 days), slightly higher per-unit cost ($5-7)
Best POD suppliers for sublimation: Printify, Gooten, Lulu
Wrap/Edge-to-Edge Printing
Best for: Full-coverage designs, bold graphics, brand logos
How it works: Design wraps around all four sides of the case. Requires precise file setup.
File specs:
- Format: confirm the accepted artwork format, resolution and color profile with the selected supplier.
- Dimensions: Front panel + left edge + right edge + back panel (mapped in template)
- Safe zone: 0.5" minimum on all edges (wraps tend to shrink slightly)
- Maximum width: 8.5" (standard wrap limit)
Pros: Maximum design area, immersive visual impact, premium feel Cons: Most complex setup, highest potential for misalignment, requires template-based design
Best POD suppliers for wrapping: Contrado (best for wraps), Gooten
Choosing Your Print Method
Use this decision tree:
- Photo/detailed designs → UV Printing
- Gradients/all-over patterns → Sublimation
- Bold graphics/full coverage → Wrap Printing
- Mixed portfolio → UV + Sublimation (add wraps in month 3+)
Start with one method. Your configurator needs different templates, mockups, and file prep for each. Multiple methods = multiple failure points.
Setting Up a Configurator on Shopify: Step-by-Step
Step 1: Choose Your Configurator App
Popular options and their positioning for 2026:
| App | Monthly Cost | Best For | Live 3D Preview |
|---|---|---|---|
| Kickflip | $59/mo + transaction fee | Multi-case SKU management | Yes, excellent |
| Customily | $49/mo + per-item transaction fees | Simple image upload | Yes, basic |
| Makeo | Free install + pay-per-use fee | Phone cases specifically | Yes, mobile-optimized |
| CPB Custom Product Builder | Pay-per-order model; verify current cap | Multi-product customization | Yes, good |
Our recommendation for phone cases: Start with Customily ($49/mo + transaction fees) or Makeo (free + per-order fee). Both have phone case templates built-in, which saves 10+ hours of setup.
If you're managing 20+ case SKUs, Kickflip's SKU management saves you from drowning in variants.
Step 2: Upload Mockups for Each Model + Case Type
This is where most stores fail.
You need mockup images showing:
- Design on the actual phone model (iPhone 16 Pro, Galaxy S24, etc.)
- Front view
- Back view (optional but recommended for wrap designs)
- 3D angle view (optional, can improve buyer confidence when implemented accurately)
Mockup specs:
- Dimensions: 1200x1600px minimum (portrait orientation)
- File format: PNG with transparency (recommended) or JPG
- Detail level: Crisp, clean, no pixelation
- Lighting: Neutral, professional (no weird shadows)
- Background: White or transparent (don't add extra distractions)
Where to source mockups:
- Free: Figma community templates (search "phone case mockup"), Pinterest templates
- Paid: Creative Market ($10-30 per mockup set), GraphicRiver
- Best option: Commission mockups from a designer for $200-400 per phone model. This pays for itself in 50 orders.
Cheap mockups kill conversion. If your iPhone 16 mockup looks pixelated or the colors are off, customers assume the print quality is bad. It's not—it's just a bad mockup.
Step 3: Set Up Product Variants
Each phone model + case type = one Shopify product.
Example structure:
Product: Custom iPhone 16 Phone Case
├─ Variant 1: Snap Case
├─ Variant 2: Tough Case
├─ Variant 3: MagSafe Case
└─ Variant 4: Wallet Case
Alternative (flat variant structure):
Product: Custom Phone Case
├─ Variant 1: iPhone 16 / Snap Case
├─ Variant 2: iPhone 16 / Tough Case
├─ Variant 3: iPhone 16 / MagSafe Case
├─ Variant 4: Galaxy S24 / Snap Case
├─ Variant 5: Galaxy S24 / Tough Case
...
Use the first approach (one product per phone model) if you have fewer than 10 models. Use the second if you're expanding rapidly.
Why this matters: Your configurator needs to know which mockup to display and which file specs to enforce. Flat variants make this easier but create a longer product list. Nested products are cleaner but harder to navigate in the app.
Step 4: Connect to Your POD Supplier
Most configurators integrate with Printify, Spring (formerly Teespring), Gooten, or similar POD partners via:
- Native integration (app connects directly to supplier API)
- Zapier (if no native integration exists)
- Manual CSV import (slowest option)
Setup checklist:
- [ ] POD account created and tested with a sample order
- [ ] Product templates set up with correct print method and file specs
- [ ] Configurator app authenticated to your POD account
- [ ] Test order placed and verified (design, file quality, shipping time)
Don't skip the test order. Print one case yourself. Check for color accuracy, print placement, and edge quality.
Step 5: Configure Safe Zones and Design Rules
Your configurator should enforce these rules automatically:
For snap cases:
- Printable area: Full back + edges
- Safe zone (avoid cutting): 0.25" margin
- Text minimum size: 6pt
- Maximum image resolution: 300 DPI
For tough cases:
- Printable area: Back + partial sides
- Safe zone: 0.375" margin
- Text minimum: 8pt (thicker designs work better on rough edges)
- Max resolution: 300 DPI
For MagSafe cases:
- Non-printable area: 1.5" circle at center back (magnet housing)
- Printable area: Outer ring only
- Safe zone: 0.5" from magnet circle
If your app doesn't let you set these rules, you'll get support tickets saying "My design is cut off" or "The magnet is on top of my photo."
Live Preview and 3D Mockups: Why They Matter
Static mockups force customers to imagine the final product. Live preview can improve buyer confidence because customers see their own image, text, and placement before checkout. Treat conversion lift as a benchmark to measure in your own store, not a universal guarantee.
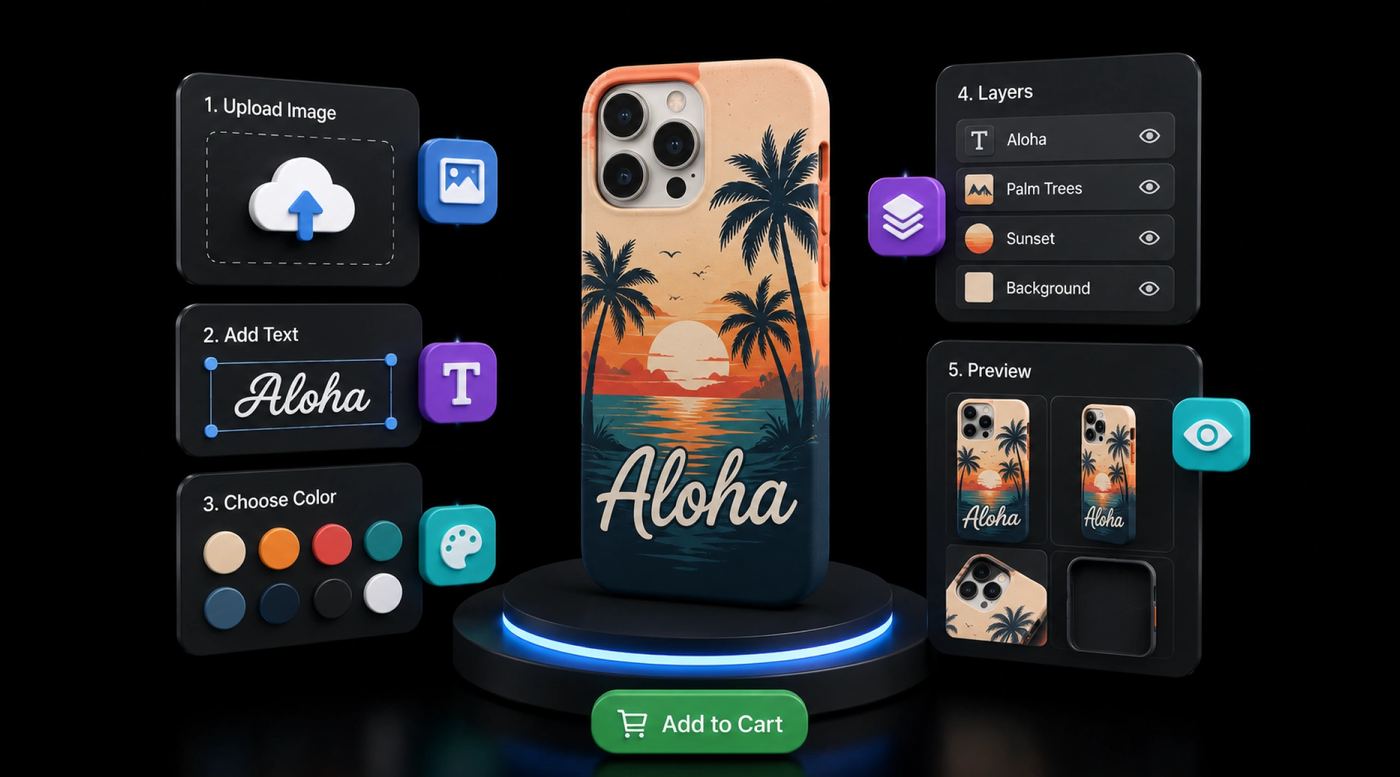
What "live preview" means: As the customer uploads or modifies their design, the mockup updates in real-time. They see their photo rotated to the phone angle. They see text spacing. They see exactly what they'll receive.
Native 3D preview lets shoppers inspect a model from different angles when the chosen system supports it. It requires suitable model assets and does not guarantee a reduction in returns or exact production color.
Conversion impact by preview type:
| Preview Type | Expected Impact | Implementation Time |
|---|---|---|
| Static image only | Baseline | 1 hour |
| Live 2D preview | Usually improves confidence and reduces "will this fit?" support questions | 3-5 hours |
| 3D preview (interactive) | Strongest fit for wrap/edge-to-edge cases where side visibility matters | Full day setup |
| Video preview | Useful for ads and landing pages, less important than live 2D on the product page | 2+ days |
Start with the preview your product requires. Add native 3D only when there is a clear customer need and the assets, integration and maintenance effort are justified.
Tools for 3D mockups:
- Kickflip: its documented configurator uses image-based 2D preview, not a built-in native 3D model viewer. See https://gokickflip.com/ecommerce-product-configurator.
- For any provider, verify native 3D rotation separately from multiple 2D product views. Do not assume a personalization preview is a 3D engine.
- For a documented 3D/AR offering, review Zakeke’s official product information and verify the particular product, model and plan: https://www.zakeke.com/.
- Custom route: Spline (free 3D design tool) + embedded viewer
Pricing Strategy That Works
This is where most stores leave money on the table.
Don't use this formula:
Price = (Cost + $3) × 2This ignores pricing psychology and leaves money on the table.
Use this instead:
Base price = (Print + shipping cost) × 3

Example (Snap Case):
- Print cost: $4
- Shipping: $2
- Base price: $18
- Customization fee: +$5
- Final price: $23
Customization fee breakdown:
The customization fee isn't just profit—it's a segmentation lever. By charging $5-8 extra for customization, you: 1. Filter out price-sensitive shoppers (they buy blank cases elsewhere) 2. Attract high-intent buyers (they value personalization) 3. Improve margins on the core product
A/B tested pricing tiers:
| Segment | Case Type | Base Price | Custom Fee | Total |
|---|---|---|---|---|
| Budget | Snap | $16 | $4 | $20 |
| Standard | Tough | $24 | $6 | $30 |
| Premium | MagSafe | $32 | $8 | $40 |
| Luxury | Wallet | $28 | $7 | $35 |
Volume pricing (increase AOV):
- Buy 1: $20 (standard)
- Buy 2: $18 each ($36 total) — 10% discount
- Buy 3+: $16 each — 20% discount
Offer this as a variant option or as a post-purchase upsell.
Gift card upsell:
Offer customers a $5 off code for referring a friend. Treat referral lift as something to measure over 30 days rather than assuming every purchase produces multiple follow-on orders.
Common Pitfalls and How to Avoid Them
1. Low-Resolution Uploads
Problem: Customer uploads a 500x500px photo. Configurator scales it to fill a 1200x800px case mockup. Result: blurry, pixelated print.
Solution:
- Set minimum upload resolution: 1000x1000px
- Add validation message: "Image is too small. Upload at least 1000x1000px for crisp prints."
- Consider resizing engine that upscales with AI (Upscayl, Bigjpg)—works surprisingly well for portraits
2. Wrong DPI in Files
Problem: the uploaded artwork has too few pixels for the final print area. A 72 DPI metadata tag alone does not establish poor quality; compare pixel dimensions with the supplier’s required physical size and resolution.
Solution:
- Your configurator should auto-convert to 300 DPI on export
- Include DPI requirement in design guidelines (visible during upload)
- Test with your POD supplier—do a sample run first
3. Incorrect color profile for the supplier
Problem: artwork is prepared in a different color profile from the supplier’s specification, or the design relies on colors the process cannot reproduce. Check the exact print template and approve a sample.
Solution:
- Use the supplier’s requested profile. Do not apply automatic RGB-to-CMYK conversion unless that workflow is explicitly required and validated.
- Add this to your upload pre-processing
- Show a color preview warning: "Colors may differ slightly from your screen due to print process."
4. Design Extends Beyond Safe Zone
Problem: Customer puts a photo edge-to-edge. During manufacturing, a 0.125" bleed is applied. Their photo gets cropped.
Solution:
- Enforce safe zone boundaries visually in the configurator
- Show a "danger zone" (red outline) where designs will be cut off
- Include a preview that shows what the final print will look like after bleed
5. Phone Model Mismatch
Problem: Customer orders "iPhone 16 case" but the manufacturing system ships an iPhone 15 case.
Solution:
- Make phone model selection prominent (large dropdown, not hidden in variants)
- Confirm on checkout: "You're ordering a custom case for iPhone 16"
- Use Shopify's product barcode field to tag SKUs with phone model code
6. Wrong Case Type Shipped
Problem: Customer orders a snap case but receives a tough case (or vice versa).
Solution:
- Test your variant mapping weekly (spot-check 5 orders)
- Use your POD supplier's order import API to verify case type is transmitted correctly
- Add case type to the order confirmation email explicitly
Live Preview and Advanced Features
If you're ready to go beyond basics:
Image Upload with Background Removal
Some configurators (Customily, Makeo, Kickflip) offer one-click background removal. This is a big conversion booster—customers don't have to use Photoshop.
Impact: Often improves completion on photo-based designs because customers do not need Photoshop or manual cutouts.
Text Editor
Let customers add names, initials, or custom text directly in the configurator.
What to enforce:
- Font selection (limit to 5-6 fonts to avoid kerning disasters)
- Text size limits (8pt minimum, 96pt maximum)
- Character limit (25-50 characters depending on layout)
Pro tip: Offer 1-2 free monogram fonts (sans-serif for legibility). Premium fonts (script, decorative) are a $2 upsell.
Template Library
Pre-designed case layouts (geometric patterns, seasonal themes, sports themes) reduce friction for customers who don't have a design idea.
You don't need many: 15-20 well-designed templates beat 100 generic ones.
FAQ: Custom Phone Case Configurators
Q: What file size should customers upload? A: Set format and size limits using the app’s supported settings and the supplier’s artwork requirements. Check pixel dimensions at the intended print size. Keep the original upload when needed for production; do not assume compression preserves sufficient detail.
Q: What DPI do I actually need? A: 300 DPI minimum for photos. If a customer uploads 150 DPI, most configurators will ask them to re-upload. This is normal—don't reduce the requirement.
Q: Are MagSafe cases worth offering? A: Yes, but only if you have mockups that show the magnet area clearly. Customers need to see that their design won't cover the magnet. Test with one phone model (usually iPhone 15 Pro or iPhone 16 Pro) before rolling out across all models.
Q: How long does it take to set up a configurator? A: 4-6 hours for the first phone model (using a template app). Each additional model takes 30-45 minutes. Mockup sourcing is the biggest time sink (plan for 2-4 hours per model).
Q: Where should I source blank cases? A: Start with Printify or another phone-case-focused POD catalog and verify current model coverage before launch. Spring (formerly Teespring) may be relevant for creator-led channels, but do not assume it has the same catalog depth or Shopify workflow as a dedicated POD app. Gooten is often a fit for sublimation. For POD, never buy inventory yourself—only use print-on-demand integration.
Q: What's the average refund rate for custom cases? A: Track this in your own store. Custom cases can have lower refund pressure than apparel when preview, model selection, and safe zones are accurate, but most refunds still come from upload errors, model mismatch, or unmet expectations. Use live preview and clear upload validation to reduce avoidable refunds.
Q: Can I sell custom cases without worrying about copyright? A: No. You're liable if customers upload copyrighted images (movie scenes, brand logos, sports jerseys). Add a terms-of-service clause: "Customers warrant that uploaded designs don't infringe third-party rights. Seller is not liable for customer misuse." This doesn't eliminate liability, but it clarifies responsibility. Consider adding a DMCA takedown process.
Q: What's the typical AOV for phone cases? A: Single case: $24-35. If you offer volume pricing, AOV jumps to $52-68 for 2-3 cases ordered together. Bundle offers (case + screen protector) can push AOV to $40-50 per order.
Q: Should I use live preview or static images? A: Use live preview if customization is the core value proposition. It can improve buyer confidence and reduce avoidable support issues, but the ROI depends on your app cost, AOV, traffic, and how often customers personalize the product. Static images alone usually are not enough for open-ended uploads.
Next Steps
- Choose one print method (start with UV or sublimation—not both)
- Pick one phone model (iPhone 16 or Galaxy S24)
- Pick one case type (snap case is easiest)
- Source mockups (free Figma templates or $200-400 designer commission)
- Pick an app (Customily for simplicity, Kickflip for scale)
- Test with your POD supplier (order one case yourself)
- Launch (public announcement + email to list)
Track these metrics for the first 30 days:
- Configurator engagement rate (% of visitors who upload a design)
- Abandonment rate (% who start but don't complete)
- Average order value (AoV)
- Refund rate (should be 1-3%)
If configurator engagement is above 4% and AOV exceeds $30, expand to a second phone model.
Learn More
- Shopify product customization guide: https://podifai.com/shopify-product-customization
- Custom coffee mug guide (similar setup): Customizing Coffee Mugs on Shopify
- Custom bags guide (print method comparison): Custom Bags and Totes on Shopify
- Podifai live preview feature: https://podifai.com/features/live-preview
Last updated: May 17, 2026. Phone case market data sourced from Printify, Technavio, and market research reports. Configurator pricing reflects 2026 rates and features.